Monday 30 September 2013

Our Wedding - Another Project, Drinks Crates

My fiance and I decided that we'd like to use apple crates to put our bottles of homemade ginger beer and elderflower at our reception but were having difficulty finding any that weren't personalised(they cost a bomb) or that were just generally suitable.

Our local shops have started having weekly street markets and I spotted these crates

Although they're not exactly what we wanted, once we've cut them down a little, whitewashed and decorated them they'll be perfect.

Look out for updates on this project, as Sam wants to help I have a feeling it will be interesting!

M xx

Our wedding - A DIY Project, Tears of Joy Packets

Getting engaged is exciting enough but when you actually set a date, well that's when everything seems to go crazy. From spending a small fortune on wedding magazines and attending every possible wedding fair down to spending every waking hour trawling the web for ideas and inspiration and following every wedding blog going, I've done it all.

As great as all of these sources of inspiration are, my goodness they can add to your workload!
One particular idea I came across was on an American website WeddingBee, the tears of joy packets are just the cutest little things.
The idea behind them is quite simple, a small envelope that encompasses a tissue(or two) with the outside of the pack decorated with a poem maybe.

So in typical whirlwind Emma fashion I set about searching for these small envelopes which I found on eBay. Whilst waiting for them to arrive I decided that I wanted the packets to have the same look as the rest of our stationary so I bought all of the materials I needed.

Materials I used:
Glassine envelopes (purchased from here)
Sage green ribbon
Gold card
Cream card blanks (c6 size from hobbycraft) 
Multipack of individual packs of tissues (purchased from poundland)
Gold coloured diamantés 
Double sided tape
Super glue
Paper trimmer or scissors


I started by cutting my card blanks so that they were 8cm wide (you'll get 2 strips from each card blank)

While I was doing that my maid of honour and fiancé had the wonderful task of putting an individual tissue in each envelope( as the tissues were from mini packs they were already folded perfectly). Once they had finished that they began cutting lengths of ribbon long enough to fit around the envelopes, horizontally. 

Using Microsoft word on my laptop I typed the following poem "If you shed a tear or two, Here's a tissue just for you. So wipe away that happy tear, We're so glad that you are here' I set the paper size setting to the custom size of the strips that I had cut so that the poem would be in the middle. Using the size and font that I did, I was able to fit the poem on the strip three times, printing on the strips vertically.

At this point I should point out that a lot of brides have used business cards instead of faffing about with buying card and cutting it to size, printing poems and playing about with layouts, especially as they are also the perfect size for these envelopes but I was just too impatient to order them and wait!

Once I was happy with the layout of the poem I printed 10 strips at a time. Which once cut into business card size would give me 30 cards.


Using my paper cutter, I trimmed each strip into three equal cards with a poem on each.

On the back of the poem cards I stuck two strips of double sided tape so I could back this card onto the gold card with a piece of ribbon sandwiched between the two pieces of card.

Once I had mounted a few of the poem cards onto the gold card I trimmed them all to equal size so that the gold card bordered the cream card a little.

My fiancé, Sam, stuck a strip of double sided tape horizontally in the middle of each envelope ready for me to attach the poem. Once attached we used a small square of double sided tape to seal the ribbon at the back.

As we wanted these to be in keeping with the rest of our stationary, we simply glued a single diamanté onto the ribbon each side of the card.

Yes, quite a fiddly DIY project but we both love them and can't wait for our guests to see them.

M xx

Sunday 29 September 2013

Traditional Tea Loaf-with a twist! #GBBO Week 6 - Sweet Dough

This weeks Great British Bake Off really excited me, sweet dough, what is there not to like???

I couldn't wait to get started but unfortunately illness struck so I decided to make a regular from my very own recipe book-A Tea Loaf with a Twist

This recipe is super quick and easy and the results are delicious!


Ingredients
250ml black tea
300g dried mixed fruit
125g brown sugar
250g plain flour
1 teaspoon baking powder
1/2 teaspoon bicarbonate of soda
1 egg
A pinch of all spice
2 tablespoons dark rum

Method 
Soak the dried mixed fruit in the tea overnight.

Grease and line a loaf tin.

In a bowl mix the brown sugar, flour, baking powder, bicarbonate of soda and all spice. Once mixed add the soaked fruit and beat well.

Once the fruit and dry ingredients are well combined add the egg and rum and mix well.

Pour into the loaf tin and cook in the middle of the oven

Ideally you would leave to cool and then slice and spread with butter but in my house they like it still warm from the oven then once spread the butter melts immediately.


There aren't too many pictures from me this week as I'm suffering with tonsillitis and feel rotten but for more scrum my recipes and pictures, head on over to Mummy Mishaps and The Crazy Kitchen


mummy mishaps

M xx


Monday 23 September 2013

Weekly Meal Planner

Like many parents I too often find it a struggle to come up exciting and varying meals to feed the family week in week out and there are times when I feel like I'm cooking the same meal over and over again.

So as not to bore everyone and risk plates full of wasted food, I asked the kids to come up with this weeks meal planner.

Brought to you, by the kids...

Weekly Meal Planner

Monday
Shepherds pie with baked beans and sweetcorn

Tuesday
Lamb stew with dumplings

Wednesday
Homemade pizzas

Thursday
Spaghetti bolognese

Friday
Chilli com carne and rice

Saturday
Ikea got dogs and fries

Sunday
Roast chicken and all the trimmings 

Heading into this week what are some of your children's favourite meals? 

M xx

Sunday 22 September 2013

Rocky Road Traybake #GBBO Week 5 Traybakes, Tuiles and Biscuit Towers!

Since I began taking part in Jenny Berry and Helen Hollywood's Great British Bake Off Bake Along, I have been bothered by my 2 boys who want to be involved or help with the baking. I've so far been very apprehensive to let them get involved with the delicate pastry making or decorating the dainty petite fours but this weeks challenge was perfect; Traybakes, Tuiles and Biscuit Towers. 
The kids decided straight away that this week they would be making a traybake. Not one to discourage boys from baking I took them to the supermarket to buy them the ingredients for their Rocky Road Traybake.


mummy mishaps


Ingredients
300g chocolate
125g butter
2 tablespoons golden syrup 
As much or as little as you like of the following:
Mini marshmallows
Digestive biscuits
Glace cherries
Mixed dried fruit
Pink wafers
Meringue nests and just about anything else you want to add!
Icing sugar to dust


Method
Put the biscuits in a freezer or sandwich bag and crush into smallish pieces. Then empty into a bowl.


In a saucepan melt the chocolate, butter and syrup. Stir continuously until there are no lumps of chocolate remaining and the mixture is smooth. Move the pan off of the heat.


In the bowl with the biscuits, add all of the other ingredients you are using and mix.


Pour the chocolate mixture into the bowl with the other ingredients and mix well until everything is coated.

Put all of the mixture into a line tray making sure you pack the mixture in tightly. Press down the top with the back of a wooden spoon.

Put the tray to one side to cool down. Once completely cool, put the tray into the fridge for about 2 hours or until the Rocky Road mix is completely set.

Remove the tray from the fridge and dust with the icing sugar.

Cut into bars and serve.


These really didn't last very long in our house at all!!


Friday 20 September 2013

Rambling Mummy Loves...

Like a lot of people up and down the country, I like to freshen up the house with a lick of paint and some new accessories before the festive season descends upon us.
Despite my fiances best attempts to keep me away from a paint brush I have already mapped out some of my projects for the house this Autumn and spent a lot of time searching for the perfect accessories.
This weeks Rambling Mummy Loves... features some gorgeous household finds.

As we have just purchased a new sofa I couldn't help but search for some new cushions to lavish the sofa with. After searching high and low for something that suited the colour scheme of the lounge and that would be a good fit with the new sofa, I found the perfect cushions in quite an unlikely place.
I discovered these in Wilkinsons of all places and at just £6 each or two for £8.00 there is no reason why you can't buy a few of these, which is exactly what I did...in various shades of green and beige.

As it is getting darker, earlier and we don't have much natural light in our hallway a great way to reflect the light we do have is by using mirrors. We currently have one in our hallway but I am on the lookout for something 'slightly' larger. I'm yet to find one that will work in our hallway but I've found some beautiful ones so far.

 This grand renaissance mirror would look fab over a mantle piece and add a touch of decadence to any home. If, unlike me, you have a mantle piece and fancy adorning your home with this beautiful mirror then grab yours now from Dunelm Mill.

Keep those nasty breezes and chills out of your bedroom with some gorgeous curtains. In most rooms in my house we have both curtains and blinds, but I love the cosy, luxurious look and feel of thick lined curtains in the autumn and winter months and they are sure to keep the chills out.


You'll be sure to have sweet dreams with these at your window. These ready made blackout curtains available at Terry's Fabrics are a fab choice to keep the light out for those lazy weekend lie ins but will keep the warmth in.

Do you have plans to jazz up your property before the festive season? I'd love to see your finished projects.

M xx


Wednesday 18 September 2013

Coughs Colds and Sneezes!

As much as I love the routine and structure that September brings to our lives I hate the coughs, colds, sneezes and bugs it brings and having 3 children all in school it has become almost a tradition that one will bring home some form of a bug and kindly share it with the rest of the family.

I'm always on the lookout for something that will help prevent any or all of the above so when I heard about a new drug free and non-drowsy product I was eager to give it a go.
Nasal Guard Cold & Flu Block is a water-based, drug free gel that is designed to reduce the likelihood of getting ill from cold and flu viruses by creating an invisible barrier around the nose. One of the biggest reasons I was keen to give it a go was that as it is drug free it means it can be used whilst taking other medicines and is suitable for children, the elderly and can be used during pregnancy.

The Cold & Flu Block comes in a handy handbag/pocket sized tube yet amazingly contains up to 150 applications and as you do not apply it directly to the nose area it means one tube is all a parent needs to 'dose up' the kids on the go!

In our house I can pretty much guarantee that someone will have a cold by the start of the second week in September so I was keen to start using this ASAP on everyone.


You simply squeeze 1-2 drops of the gel onto your forefinger and rub between your forefinger and your thumb. The white, non-greasy gel becomes clear as soon as it is rubbed and can then be applied directly around the nostrils and upper lip. The gel has no smell and I've worn it both when wearing and not wearing make up. The kids surprisingly enough had not complained once and what's more, it seems to be working. No coughs, colds or sneezes!!!

Nasal Guard Cold & Flu Block can be purchased exclusively at most Boots stores nationwide and is available online at www.boots.com 


M xx


*This is a sponsored post*

Monday 16 September 2013

Slow Down Mummy

I stumbled across this poem some time last week and with my eldest child starting high school, my middle child going into key stage 2 and my youngest monster starting school this month it reminded me just how quick they grow from our babies into adults.

There are so many sayings and proverbs about treasuring our children out there but there is just something about this poem that really touches my heart and makes me stop and think.

As hectic as life can be in today's society we really do need to slow down and appreciate the little things and cherish the special moments we share with our children. They are our babies today and grown tomorrow.


Slow Down Mummy


                                           Slow down mummy, there is no need to rush,
Slow down mummy, what is all the fuss?
Slow down mummy, make yourself a cup of tea.
Slow down mummy, come spend some time with me.


Slow down mummy, let's pull boots on for a walk,
Let's kick at piles of leaves, and smile and laugh and talk.
Slow down mummy, you look ever so tired,
Come sit and snuggle under the duvet, and rest with me a while.


Slow down mummy, those dirty dishes can wait,
Slow down mummy, let's have some fun - bake a cake!
Slow down mummy, I know you work a lot,
but sometimes mummy, it's nice when you just stop.


Sit with us a minute,
and listen to our day,
Spend a cherished moment,
because our childhood won't stay!

~ R Knight

Sunday 15 September 2013

Weekly Meal Planner

Now we're getting back into the swing of things and with the youngest monster starting school full time on Monday(yay) it's getting easier to plan our weekly meals around all of the extra curricular activities and with the weather turning chilly those hearty meals are making a comeback in our house.


Weekly Meal Planner

Monday
Pork loins with golden vegetable rice

Tuesday 
Chicken and mushroom pie, new potatoes and vegetables

Wednesday 
Meatballs and tagliatelle in arribiata sauce

Thursday
Jerk chicken, rice and peas

Friday
Sausage, mash and onion gravy

Saturday
Chilli con carne, wedges and tortilla chips

Sunday
Roast lamb dinner with all the trimmings

Are there any meals making a comeback in your house owing to a change in the weather?

M xx

Savoury Tart #GBBO Week 4 Pastry, Pies and Tarts

I have to admit I was quite relieved to see this weeks Great British Bake Off focused on pastry, pies and tarts. Whilst I  love desserts and enjoyed making my petit fours for last weeks challenge, it was a monumental task! 
Now I wouldn't say I'm a pro but I do make pastry quite often at home so I was happy to be able to devise a flavoursome yet practical recipe for this weeks challenge.


mummy mishaps


Suitable on its own as a light lunch or perfect with chips and salad for tea, introducing my Bacon, Chestnut Mushroom and Caramelised Red Onion Tart in a Sage Pastry Tart


Ingredients
Pastry
250g plain flour
110g butter cubed
Pinch of salt
4 tablespoons of cold water
sage

Filling
300g unsmoked bacon
159g baby chestnut mushrooms
1 red onion
4 eggs
30ml milk

Put the salt, flour and chopped sage into a bowl and add the cubed butter.

Using your fingertips combine the ingredients until it resembles coarse breadcrumbs.

Use as much of the water as needed to bind the ingredients into a dough. Wrap in cling film and chill for 15-30 mins.

Whilst the dough is chilling chop the mushrooms into slices or quarters and gently fry in a little oil until cooked. 

Once cooked drain any excess liquid and set aside.

In the pan used to cook the mushrooms gently fry the chopped bacon and onion slices until the bacon is cooked and the onions have caramelised.

Roll the pastry out and line a tart tin with the dough and prick the base

Blind bake the pastry for 20 mins or until it is a pale golden colour.

Beat the eggs and milk and season to taste.

Fill the pastry case with the mushroom, bacon and onion filling and pour in the beaten egg.

Bake for a further 15-20 minutes or until the egg is set.
           No 'soggy bottoms' here!

For the purposes of lunch boxes tomorrow, I made individual tarts but I would usually make a big one for us all to share.

*You could add creme fraiche to the beaten egg mixture but as nobody in our house eats it, I omitted it from the recipe*

Enjoy!

For more tantalisingly tasty bakes visit Mummy Mishaps and The Crazy Kitchen


Friday 13 September 2013

Rambling Mummy Loves...

As the weather has taken a turn and not for the better, my thoughts have turned to the cosy winter nights spent snuggled up in the house and the opportunity to dress for the weather in chunky knit jumpers and funky welly boots.
So this weeks Rambling Mummy Loves... is focusing on preparing for whatever this season brings.

One of my all time favourite autumn/winter activities is jumping in puddles and kicking up piles of leaves with this kids. Any self respecting puddle jumper needs some funky, trendy wellies to do the job properly and you need look no further than Funky Wellington Boots
With some amazing designs to choose from your bound to find something to tempt you into those muddy puddles.
These are my absolute favourite. For me you just can't beat a pair of polka dot wellies and let's face it, who wouldn't want to be playful in these.


Who could possibly resist wanting to snuggle up on the sofa with a marshmallow topped hot chocolate wearing this gorgeously soft dressing gown.

Available from Matalan and at just £16.00 this one is definitely something you can treat yourself to!


Set the mood with this gorgeous tealight holder from Not on the High Street. 


Whether romantic and sensual or warm and cosy this wooden log tealight from The Wedding of my Dreams is sure to aid and assist your plans to unwind.

Whatever your plans for this weekend or indeed this season make it fabulous.

M xx

Thursday 12 September 2013

Laura Lou Rambles With You: Mummies & Youngies

Today's blog post is courtesy of the lovely Laura Mckelvey. This young lady is a friend of one of my sisters and a true inspiration. Life hasn't been kind to her recently yet she has managed to bounce back even stronger and show the world what she is made of. I'm proud to know Laura and call her a friend. 

Laura Lou Rambles With You: Mummies & Youngies: Since having my operation I've found it really hard to get back on track with my healthy eating regime, & due to the surgery I canno...

Sunday 8 September 2013

Weekly Meal Planner

With back to school in full swing this week it means that along with it are all of the extra curricular activities after school. In our house, that means swimming lessons, bmx sessions, music lessons, martial arts, scouts and football club!

With all of these clubs happening, it means there are quite a few days where I need to cook early on in the day so that as soon as the kids come in from school, they're fed, changed and out the door!
With the exception of Tuesday, which is my son's 9th birthday so we will more than likely go out for a meal.

With that in mind, here's this weeks weekly meal planner.


Weekly Meal Planner

Monday 
Beef stew and dumplings with homemade bread.

Tuesday 
Eating out

Wednesday
Shepherds pie with vegetables

Thursday
Corned beef and rice

Friday
Toad in the whole with mash and beans

Saturday
Turkey curry with noodles

Sunday
Roast chicken dinner with all of the trimmings!

Have a great week!

M xx

Petit Fours #GBBO Week 3 Desserts

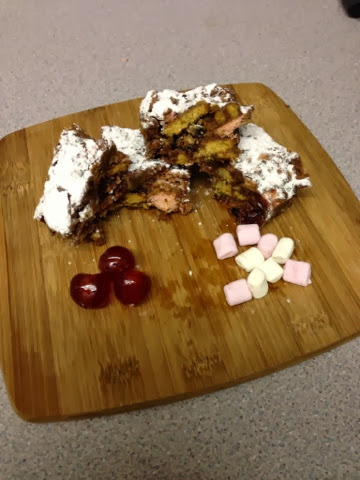
Ok, before I begin you may want to grab yourself a cuppa and a slice of cake, this post is quite a lengthy one!

On seeing the bakers' challenge this week on The Great British Bake Off I couldn't have been happier, desserts. My excitement then turned to despair when I saw that the first bake was trifle, knowing that I was going to blog for The Great British Bake Off Bake Along  I panicked, I've not eaten a trifle in about 20 years, don't like them and can't remember what they taste like. Oh dear! Then came the floating cakes, cue more panic, how could I make these when I didn't even know what they were!
Finally, petit fours, my favourite kind of dessert and whilst I looked forward to the challenge I knew it wouldn't be an easy one. 
Multi-tasking was the key to getting these made but with back to school and all the chaos that goes with it I had a feeling it wasn't going to be easy. It was a labour of love but a triumphant one.

Introducing, my petit fours


All of the recipes make an abundance of petit fours!

mummy mishaps

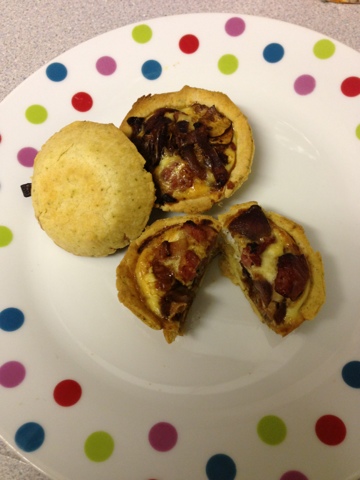
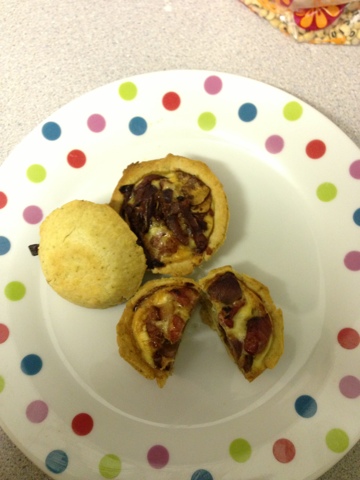
Lemon shortbread biscuits with chantilly cream and raspberry sauce.
Ingredients
250g Plain flour
175g Butter
Zest of 2 lemons
1 teaspoon lemon juice
300ml Double cream
100g Icing sugar
300g Raspberries

Method
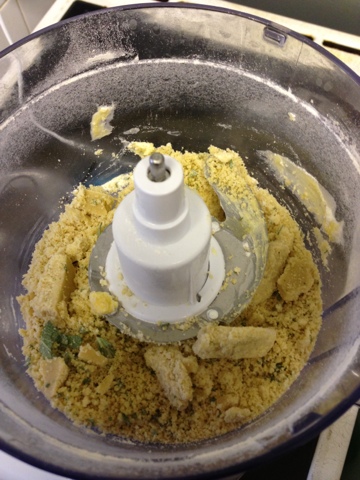
Combine the flour and butter until they resemble breadcrumbs
Add the lemon zest and lemon juice and mix until it all forms a dough, knead until shiny.
Wrap in cling film and leave to chill for 40 mins.
Remove from the fridge and weigh small 10g balls of dough.
Shape the dough into rounds and place on a baking tray. Bake for 14-16 mins.
 

 In a bowl, combine the double cream and icing sugar until the mixture holds its shape.
Blitz the raspberries and icing sugar together in a blender until they form a sauce.
Pipe some cream on top of the biscuits and drizzle with the raspberry sauce.
Finish with a fresh raspberry


Chocolate cake with chocolate and mint buttercream and white chocolate drizzle
Ingredients
100g butter
260g caster sugar 
2 eggs
1/2 teaspoon vanilla extract
1/2 teaspoon bicarbonate of soda
1/2 teaspoon baking powder
170g plain flour
150ml whole milk
300g Icing sugar
125g Butter
3 Mint leaves

Method 
Cake
Cream together the butter and sugar until light and fluffy
Add the eggs one at a time scraping any unmixed ingredients from the side of the bowl.
Beat into the mixture the vanilla extract, bicarbonate of soda and baking powder.
Add just half of the flour and fold in with a metal spoon
Add the milk, mix it in then fold in the remaining flour.
Bake for about 30 mins or until cooked through.
Buttercream
Combine the icing sugar, coca powder and butter until smooth.
Chop up 3 mint leaves very finely and incorporate into the buttercream, mixing well.
Cut 3 pieces of cake each measuring 3cm x 4cm, then cut each piece of cake in half horizontally through the middle.
Spread an even later of buttercream on the cut side of each piece of cake then sandwich back together
Melt the white chocolate then drizzle some across the top of each cake
Pipe a small round of buttercream on the top and finish with a couple of mint leaves.


Carrot cake bites with crushed walnuts
Ingredients
300g Light brown sugar
3 Eggs
300ml Sunflower oil
300g Plain flour
1 Teaspoon baking powder
1 Teaspoon bicarbonate of soda
1 Teaspoon ground cinnamon
1/2 Teaspoon ground ginger
300g Grated carrots
100g Chopped, shelled walnuts
300g Icing sugar
50g Unsalted butter
125g Cream cheese

Cake
Beat together the sugar, eggs and oil until well mixed.
Slowly add the flour, bicarbonate of soda, baking powder, cinnamon and ginger then once all ingredients are added continue to beat until well mixed.
Stir in the grated carrots and walnuts until evenly distributed.
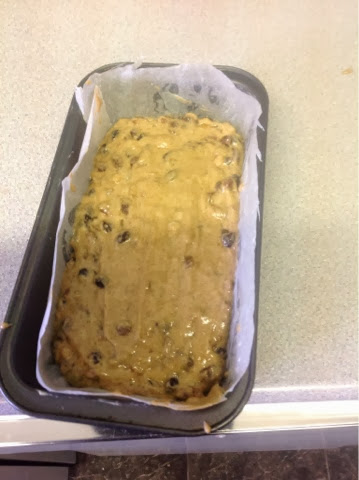
Pour the mixture into a prepared tin and bake for 30 mins or until golden brown.
When the cake is cool, cut 3cm x 4cm rectangles for the petit fours.
Cream Cheese Frosting
Beat the icing sugar and butter together until well mixed.
Add the cream cheese in one go and beat until completely incorporated. Continue to mix until light and fluffy(about 5 minutes)
Cut the rectangles of carrot cake in half horizontally and spread evenly with the cream cheese.
Sandwich back together and pipe a round onto the top of the cake and finish with some chopped walnuts.

As promised a long post, a lengthy process but they were definitely worth it!

You can check out some other fab GBBO Bake Along makes and bakes at Mummymishaps and The Crazy Kitchen